הגדרת תיבה ב-THUNDERBIRD
| the following instructions refer to a mailbox called user, under a domain called domain.co.il. replace these details with your domain and mailbox. important: if this is the first time you run Outlook, start directly from step 3. | הוראות אלו מתייחסות להגדרת תיבה דוא"ל בשם user תחת דומיין בשם domain.co.il. כמובן, יש להחליף את הנתונים האלו בשם התיבה והדומיין הרצויים. שימו לב: אם זו הפעם הראשונה שאאוטלוק הופעל, יש להתחיל ישירות משלב 3. |
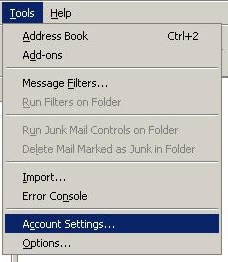
| under Tools menu, go to Account Settings. | תחת תפריט כלים, פתחו את הגדרות חשבון. | 1 |
| click on Add Account | לחצו על הוספת חשבון. | 2 |

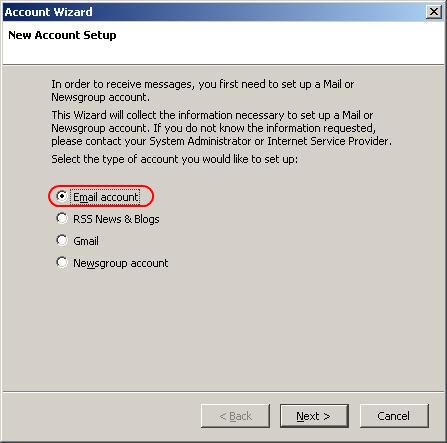
| the Email Account option is already selected. click Next. | האפשרות חשבון דואר מסומנת. יש ללחוץ על הבא. | 3 |
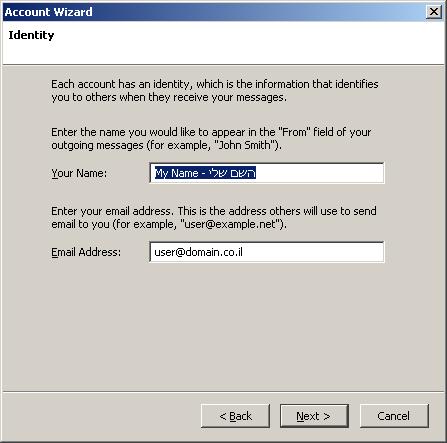
| in the Your Name field type your name or your company's name. what you type here is what people will see when you send them mail. in the E-mail Address field type your full email address. | בשדה השם כתבו את שמכם או את שם החברה. מה שרשום כאן הוא מה שאנשים שיקבלו מכם דואר יראו. בשורת כתובת הדואר הקלידו את כתובת הדואר המלאה. | 4 |
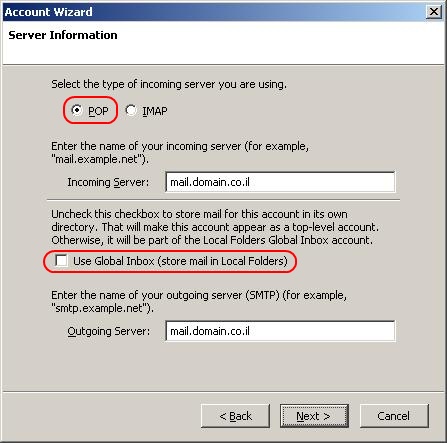
| the type of incoming server is POP3. both mail servers addresses are mail.domain.co.il. uncheck the "Use Global Inbox" option. | סוג השרת הנכנס הוא POP3. כתובות שני שרתי הדואר הן mail.domain.co.il. יש להוריד את הסימון מ-"השתמש בתיבת דואר גלובלית" | 5 |
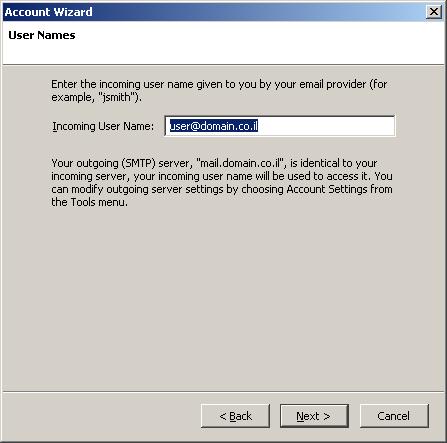
| in Incoming User Name write the full email address. | בשם משתמש לדואר נכנס יש לרשום את כל כתובת הדואר האלקטרוני. | 6 |
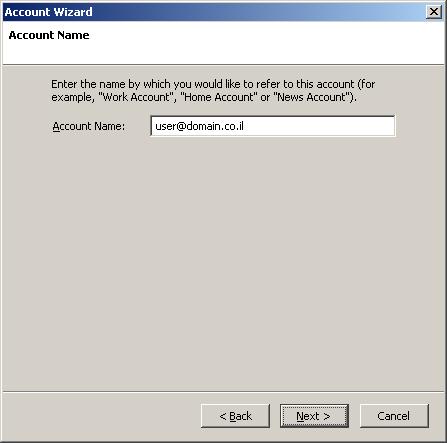
| the full email address will be writen in Account Name. it is recommended to leave it that way. this field defines the internal account name in Thunder Bird. | בשם החשבון תופיע כתובת הדואל המלאה. רצוי לשהאיר זאת כך. שדה זה קובע מה יהיה שם החשבון הפנימי בתוכנה. | 7 |
| click Finish. | לחצו על סיום. | 8 |
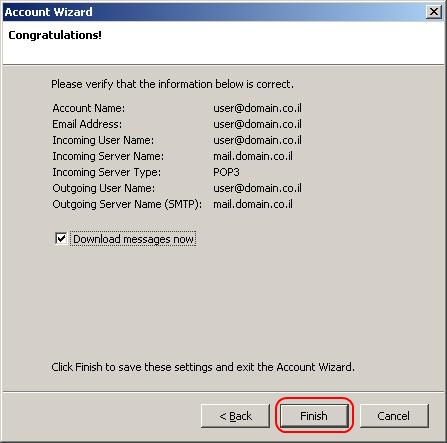
| your email account is now configured and ready to use. | כעת חשבון הדואר שלכם מוגדר ומוכן לשימוש. | 9 |
